Transform your concrete pavers with our expert techniques and tips on how to make them look like beautiful natural stones. If you need more information our Experienced concreters committed to outstanding craftsmanship and service are here to help. In this article, we will provide step-by-step instructions and valuable insights on achieving a stone-like effect on your concrete pavers. Whether you want to create a stunning stone pathway or a stone patio, we’ve got you covered with the best techniques and tips to elevate your outdoor space. Examine the intricacies in this detailed guide on How to Lay Concrete Driveway: Step-by-Step Instructions, presenting comprehensive, step-by-step guidance. Encompassing preparation to finishing touches, it provides thorough coverage of the concrete driveway installation process for success.
Key Takeaways:
- Learn how to make concrete pavers look like natural stones
- Discover expert techniques and tips for achieving a stone-like effect
- Create stunning stone pathways and patios
- Choose the right concrete mix for your project
- Explore finishing techniques for a realistic stone look
Choosing the Right Concrete Mix for Your Project
The choice of concrete mix plays a crucial role in achieving the desired stone effect on your concrete pavers. When selecting a concrete mix for your project, it is essential to consider factors such as thickness, durability, and ease of workability.
Sand Topping Mix for 2″ Thick Concrete Pavers
For concrete pavers that are 2″ thick, we recommend using Quikrete’s Sand Topping Mix. This mix is specifically designed for applications like paver overlays, and it provides excellent results in creating a natural stone-like appearance.
Quikrete’s Sand Topping Mix is known for its self-leveling properties, making it easier to work with, particularly for larger stepping stones or pavers. This feature ensures a smooth and even surface, which is crucial for achieving a realistic stone effect.
No Reinforcement Needed
When using Quikrete’s Sand Topping Mix for pavers that are 2″ thick, there is no need for additional reinforcement unless the thickness exceeds this recommendation. This simplifies the process and saves time during installation.
Manufacturer’s Instructions and Recommended Thickness
It is important to carefully follow the manufacturer’s instructions for mixing and applying the Sand Topping Mix. This will ensure that you achieve the best results and maintain the integrity of your project. Additionally, sticking within the recommended thickness is crucial to ensure the durability and longevity of your concrete pavers.
Choosing the Right Concrete Mix for Your Project — Image source: Wikimedia Commons
By carefully selecting the appropriate concrete mix for your project, such as Quikrete’s Sand Topping Mix, you can confidently create stunning concrete pavers that resemble beautiful natural stones. Remember to follow the manufacturer’s instructions and adhere to the recommended thickness for optimal results.
Preparing the Mold and Mixing the Concrete
Before you can pour the concrete for your stepping stones, it’s crucial to properly prepare the mold and ensure your concrete mix has the right consistency. Follow these steps to ensure successful mold preparation and concrete mixing:
- Clean the mold: Begin by thoroughly cleaning the mold to remove any dirt or debris. This will help prevent imperfections on the surface of your stepping stone. A clean mold ensures a smooth finish.
- Apply a mold release agent: To make it easier to remove the cured concrete stepping stone from the mold, apply a mold release agent. This will prevent the concrete from sticking to the mold. Utilizing a mold release spray or a thin coat of vegetable oil can help achieve the desired effect.
- Mixing the concrete: There are several methods to mix the concrete: using a concrete mixer, a wheelbarrow and concrete hoe, or by hand in a 5-gallon bucket. Choose the method that best suits your needs and the size of your project.
- Workability and slump test: The key to a successful concrete mix is achieving the right workability. Workability refers to how easy the concrete is to handle, shape, and finish. You can assess the workability of your mix by conducting a slump test.
- Gradually add water: When mixing the concrete, add water gradually and mix thoroughly. This will help you achieve a smooth and workable mix. Gradual water addition ensures that the concrete does not become too wet or too dry, compromising its performance.
By properly preparing the mold and mixing the concrete with the right workability, you can ensure the best results for your concrete stepping stones.
Filling the Mold and Curing the Stepping Stones
Once the concrete mix is ready, the next step is to fill the mold and begin the curing process. Properly filling the mold is essential to ensure a smooth and level surface for your stepping stone. Here’s a step-by-step guide:
Filling the Mold
- Start by filling the bottom surface of the mold with 1/2″ of concrete. This ensures a solid base for your stepping stone.
- Use a trowel or a float to spread the concrete evenly, making sure to eliminate any air bubbles.
- Gradually fill the mold to the top, ensuring a level surface. You can use a screed or a straight board to achieve an even thickness.
It’s important to leave a 1/4″ gap between the concrete and the top of the mold. This space will aid in the de-molding process later on.
Curing the Stepping Stones
Once the mold is filled, cover it with plastic to create a controlled environment for the curing process. This helps prevent moisture loss and allows the concrete to properly cure. Follow these steps:
- Cover the mold securely with plastic, ensuring it is tightly sealed.
- Place the mold in a dry and warm area, away from direct sunlight and drafts. Temperature plays a crucial role in the curing process, and it is recommended to maintain temperatures between 50 and 90 degrees Fahrenheit.
- Allow the stepping stone to cure for a minimum of 4 days. Curing time may vary depending on the specific concrete mix used. Refer to the manufacturer’s instructions for more precise curing recommendations.
During the curing process, the concrete undergoes a chemical reaction that strengthens and hardens it. This step is crucial to ensure the durability and longevity of your stepping stones.
Once the curing period is complete, carefully remove the mold and prepare the stepping stone for the finishing techniques that will give it a natural stone look.
Finishing Techniques for a Natural Stone Look

When it comes to achieving a natural stone look on your concrete pavers, the finishing techniques play a crucial role. These techniques help enhance the appearance of your pavers, giving them a more realistic stone-like texture. Here are some key techniques to consider:
Edge Sanding: After de-molding your concrete stepping stones, you may notice sharp edges that need to be smoothed out. You can achieve this by using a diamond hand pad or a coarse sharpening stone. Simply work on the edges to create a smooth and polished finish.
Sealing: To maintain the smooth finish of your concrete stepping stones, it is important to seal the surface. Applying a sealer to the pavers not only protects them from external elements but also enhances their appearance. After applying the sealer, wipe away any excess for a clean finish.
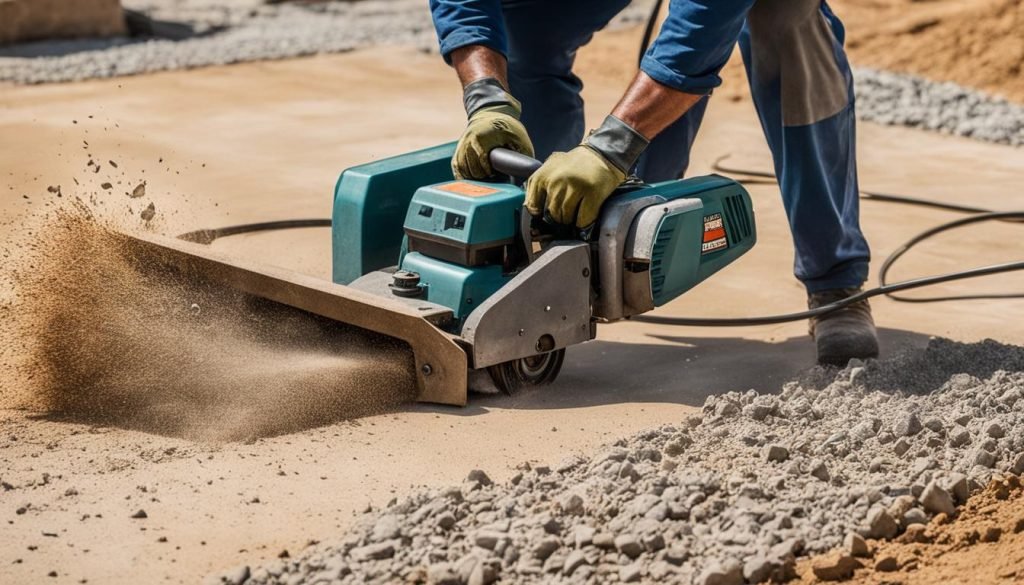
Grinding: If you want to add contrast and texture to your concrete pavers, grinding down the surface is a great option. This process involves using a water-fed polisher or a dry polisher with a HEPA vacuum to expose the rock aggregate in the concrete. The result is a more natural and authentic stone-like look.
Polishing: Polishing the surface of your concrete pavers can further enhance their appearance and create a smooth finish. This can be done using various polishing tools and techniques, depending on the desired outcome. Whether you prefer a glossy finish or a more subtle sheen, polishing can help achieve your desired look.
By incorporating these finishing techniques, you can transform your concrete pavers into stunning pieces that closely resemble natural stone. The combination of edge sanding, sealing, grinding, and polishing will give your pavers the perfect texture and appearance for a stone-like effect.
Placing and Installing the Stepping Stones
Now that your concrete stepping stones have been beautifully transformed, it’s time to bring them to life by placing and installing them in your desired location. Whether you want to create a stunning pathway or enhance various areas of your outdoor space, proper placement and installation are essential for a secure and visually appealing result.
There are two main methods for installing your stepping stones:
- Placing the stones on the ground
- Planting the stones in the ground
If you choose to simply place the stones on the ground, ensure that the surface is level and free of debris. This method works well for creating a more temporary or movable pathway or for incorporating stepping stones into a garden design. Keep in mind that without additional anchoring, these stones may shift over time.
If you prefer a more permanent and secure installation, planting the stepping stones into the ground is the way to go. Follow these steps for a sturdy and long-lasting result:
- Mark the location where you want to place each stepping stone using flour, ensuring proper spacing and alignment.
- Prepare the ground by digging a hole that is slightly larger than the size of the stepping stone.
- Fill the hole with a layer of sand, approximately 1-2 inches in depth, to provide a stable base for the stone.
- Carefully place the stepping stone into the hole, ensuring it is level and aligned with the surrounding stones.
- Gently rock the stepping stone back and forth to help it settle into the sand, ensuring a snug fit.
Repeat these steps for each stepping stone, taking care to maintain proper spacing and alignment. Once all the stones have been planted, fill any gaps between the stones with additional sand or decorative gravel to create a polished finished appearance.
Now that your stepping stones are securely placed and installed, take a step back and admire the beautiful transformation you have achieved. Not only do they provide a functional pathway, but they also add a touch of natural beauty to your outdoor space.
Pros and Cons of Placing vs. Planting Stepping Stones
| Method | Pros | Cons |
|---|---|---|
| Placing on the Ground |
|
|
| Planting in the Ground |
|
|
Advantages of Concrete Pavers Over Natural Stone

When it comes to choosing materials for your outdoor projects, concrete pavers that resemble natural stone offer several advantages over using actual stone. Let’s explore the benefits that make concrete pavers a popular choice:
- Cost-Effectiveness: Concrete pavers are a cost-effective option compared to natural stone. They provide the same aesthetic appeal at a more budget-friendly price.
- Ease of Installation: Installing concrete pavers is a simpler process. The entire patio or pathway can be poured in one step and then stamped or scored with a stone-like pattern. This saves time and effort while achieving the desired look.
- Low Maintenance: Unlike natural stone, concrete pavers are less prone to weed growth. They are also more resistant to cracking or becoming loose, making them a durable and low-maintenance option for outdoor spaces.
Concrete pavers can be customized to match any design aesthetic and offer a wide range of finishes and textures. Whether you prefer the look of slate, cobblestone, or flagstone, concrete pavers can replicate the natural stone effect beautifully. Their versatility and durability make them an excellent choice for enhancing the beauty and functionality of your outdoor area.
With their cost-effectiveness, ease of installation, and low maintenance, concrete pavers are a practical and visually appealing alternative to natural stone. Whether you’re renovating your patio or creating a stunning stone pathway, concrete pavers provide endless design possibilities without compromising on quality or aesthetics.
Design Ideas for Concrete Pavers with a Stone Look
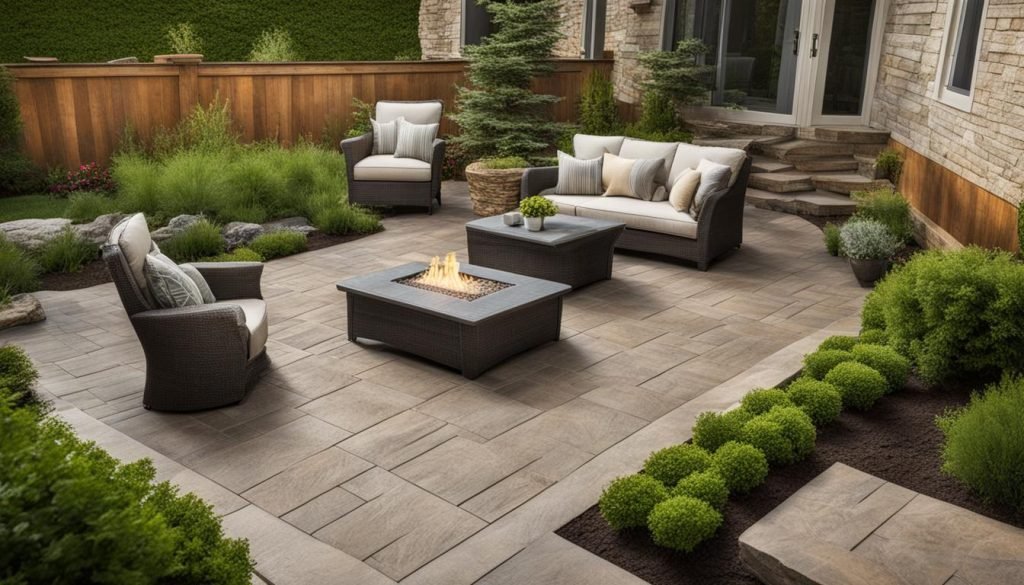
Concrete pavers with a stone look offer endless design possibilities. You can replicate various stone patterns using concrete, such as slate, flagstone, cobblestone, travertine, and fieldstone. The versatility of concrete allows you to create realistic and beautiful stone-like textures for your pavers, enhancing the aesthetic appeal of your outdoor space.
Replicating Stone Patterns
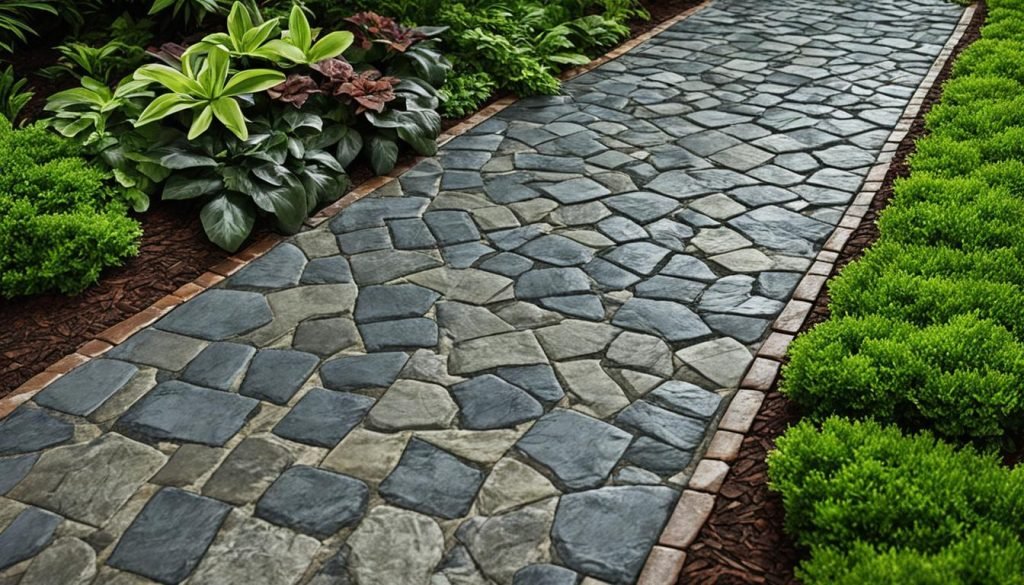
When designing your concrete pavers, consider the wide range of stone patterns that can be reproduced. You can achieve the look of elegant slate pavers, rugged flagstone pathways, charming cobblestone driveways, luxurious travertine patios, or rustic fieldstone garden paths.
Using concrete molds and stamps, you can replicate the textures and patterns of these natural stones, giving your pavers a realistic and visually appealing appearance. The intricate details of the stone patterns are preserved, creating a stunning and authentic stone-like effect.
Coloring Options
To achieve the natural color variations found in different types of stones, there are various coloring options available for concrete pavers. Stains, color hardeners, antiquing agents, and integral colors can be used to add depth and dimension to your pavers, replicating the natural hues of real stones.
Stains can be applied to create subtle color variations and create a weathered or aged look. Color hardeners provide a more intense and vibrant color, ideal for creating bold stone effects. Antiquing agents can be used to highlight textured surfaces and give an aged appearance to your pavers. Integral colors, added during the mixing process, ensure consistent color throughout the paver.
Creating a Realistic Stone Effect
To create a more realistic and unique stone effect on your concrete pavers, consider combining different coloring methods or colors. By blending colors, layering stains, or using multiple coloring techniques, you can achieve a customized look that replicates the intricate color variations and patterns found in natural stones.
Be creative with your design ideas, mixing and matching stone patterns and colors to create a visually appealing arrangement of concrete pavers. By replicating the beauty of natural stones, you can transform your outdoor space into a stunning oasis.
Explore the design potential of concrete pavers with a stone look and bring your outdoor spaces to life with the charm and elegance of natural stone.
DIY vs. Buying Concrete Pavers
Making your own concrete pavers can be a rewarding project that offers customization and potential cost savings. If you have the necessary tools and materials readily available, DIY concrete pavers allow you to create unique designs and shapes that suit your specific needs. It also provides a sense of accomplishment and personalization in your outdoor space.
However, before diving into a DIY project, it is important to consider the pros and cons compared to buying pre-made concrete pavers. Factors such as time, skill level, and budget should be taken into account when deciding between DIY or purchasing ready-made options.
The Pros and Cons of DIY Concrete Pavers
Pros:
- Customization: DIY concrete pavers give you the freedom to create the exact design and style you desire for your outdoor area.
- Cost Savings: By making your own concrete pavers, you can potentially save money compared to buying pre-made options.
- Satisfaction: Completing a DIY project can bring a sense of accomplishment and pride in your creative abilities.
Cons:
- Time and Effort: DIY concrete pavers require time and effort for the entire process, including preparation, mixing, molding, curing, and finishing.
- Skill Level: Depending on the complexity of your desired design, DIY concrete pavers may require some level of skill and expertise.
- Cost of Materials and Tools: While DIY concrete pavers can offer cost savings, it is essential to consider the upfront cost of materials and tools required for the project.
When considering DIY concrete pavers, it is crucial to evaluate your own capabilities, availability, and commitment to the project. Assessing your skill level, available time, and budget will help determine if the DIY route is the right choice for you.
Cost Comparison: DIY vs. Buying Pre-Made Concrete Pavers
Before making a decision, it is helpful to conduct a cost comparison between DIY and buying pre-made concrete pavers. This comparison will depend on various factors, including the size and complexity of your project, the cost of materials and tools, and the availability of affordable pre-made options in the market.
| DIY Concrete Pavers | Pre-Made Concrete Pavers | |
|---|---|---|
| Upfront Cost | Cost of materials, tools, and potential delivery fees | Cost per unit of pre-made paver |
| Time and Effort | Requires time and effort for the entire DIY process from start to finish | Minimal effort required for installation |
| Customization | Unlimited design options and shapes | May have limited design options based on available pre-made choices |
| Quality | Quality depends on personal skill level and attention to detail | Quality guaranteed by the manufacturer |
By considering these factors and conducting a thorough cost comparison, you can make an informed decision on whether DIY or buying pre-made concrete pavers is the most cost-effective option for your specific needs.
Ultimately, whether you choose to embark on a DIY project or purchase pre-made concrete pavers, the key is to create a stunning outdoor space that suits your style and enhances your living experience.
Conclusion
Transforming your concrete pavers to look like natural stone is an achievable and rewarding project. By following the techniques and tips outlined in this article, you can elevate your outdoor space and create a stunning stone-like effect on your concrete pavers. From choosing the right concrete mix to finishing techniques, each step plays a crucial role in achieving the desired result.
Remember to consider the advantages of concrete pavers over natural stone and explore various design ideas to make the most of your project. Concrete pavers offer cost-effectiveness, ease of installation, and low maintenance compared to natural stone. They also provide a wide range of design options, such as replicating different stone patterns and using coloring techniques to achieve natural color variations.
Whether you decide to take on the DIY route or purchase pre-made concrete pavers, the end result will enhance the beauty and functionality of your outdoor area. So go ahead and get creative with your concrete pavers, and enjoy the satisfaction of having a beautiful outdoor space with a realistic stone-like look.
FAQ
What type of concrete mix should I use to achieve a stone-like effect on my pavers?
For pavers that are 2″ thick, Quikrete’s Sand Topping Mix is recommended.
Do I need to reinforce the concrete mix for my pavers?
Reinforcement is not necessary unless the thickness exceeds 2″.
How do I prepare the mold for pouring the concrete?
Thoroughly clean the mold and apply a mold release agent.
What is the ideal consistency for the concrete mix?
The slump test can help determine the right workability of the mix.
How do I fill the mold with concrete?
Start by filling the bottom surface with 1/2″ of concrete and gradually fill it to the top.
How long does it take for the stepping stones to cure?
The stepping stones should cure for 4 days.
How do I achieve a natural stone look on the concrete pavers?
Smoothing sharp edges, sealing the surface, and grinding down the surface can create a stone-like effect.
How do I place and install the stepping stones?
The stones can be placed on the ground or planted into the soil for a more secure fit.
What are the advantages of using concrete pavers over natural stone?
Concrete pavers are cost-effective, easier to install, and more resistant to weed growth and cracking.
What design possibilities do concrete pavers with a stone look offer?
Various stone patterns and coloring options can be used to replicate different types of natural stones.
Should I make my own concrete pavers or buy pre-made ones?
Consider factors such as time, skill level, and budget to determine the most suitable option.


